mp4音频提取mp3
1 | ffmpeg -i inputfile.mp4 -vn -acodec copy outputfile.m4a |
其中 inputfile.mp4 是要提取的视频文件的文件名,
outputfile.m4a 是提取出来的音频文件的文件名。
1 | ffmpeg -i 我们的时光.mp4 -ss 00:00:00 -t 00:00:36.0 -q:a 0 -map a output.mp3 |
- ffmpeg命令中,-i 参数后面指定要提取的视频文件名称。
- -ss 指定音频提取的开始时间。
- -t 表示提取多长时间的音频。
- output.mp3表示输出音频的名称。
TTS(文本转语音)
语音转文本
Whisper 是 OpenAI 研发的一个通用的语音识别模型,可以把语音转为文本。它在大量多样化的音频数据集上进行训练,同时还是一个多任务模型,可以执行多语言语音识别、语音翻译和语言识别。
安装 rust
下载地址:
同样的,安装后需要确定命令行可以执行,测试命令:
1 | rustc --version |
如果无法执行,手动配置一下环境变量PATH。
rust 的默认安装位置是 ~/.cargo/bin。
安装 Whisper
配置python虚拟环境,因为 Whisper 需要特定版本的 python。
1 | conda create --name whisper_env python=3.9.18 |
安装依赖库:
1 | pip install setuptools-rust |
运行
命令行运行:
1 | whisper Haul.mp3 --model medium |
其中 “Haul.mp3” 是我测试用的音频文件。
“–model medium” 是指定使用 medium 版本的模型(Whisper 有多种模型:tiny、base、small、medium、large,模型大小依次变大)。
第一次运行时,会先下载指定的模型,需要耐心等待一会儿。

模型下载之后,就会开始执行语音识别,输出识别结果。
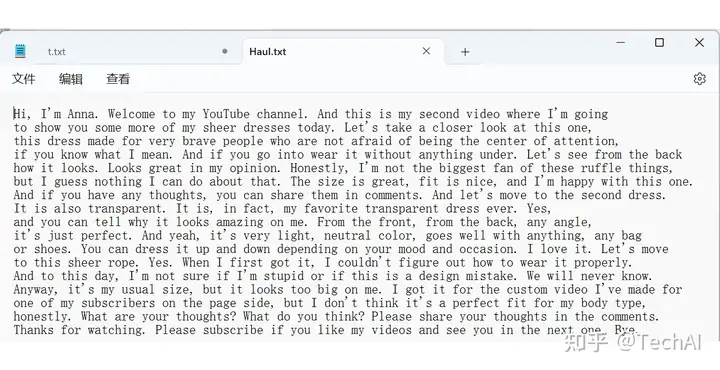
并且会自动写入文件。
Python代码中运行:
1 | import whisper |
怎么样,感觉不错吧,有兴趣的话,快试试吧。
项目地址:
#AI 人工智能,#OpenAI,#whisper, #ChatGPT,#语音转文字,#gpt890